Starting a herb garden has been one of the tasks on my bucket list. I’ve tried to find out what it takes to start a herb garden in pots and below is my research. I hope this information can help you create your own herb garden as well.
Below are the steps you need to grow a herb garden in pots.
- Pick the right variety of herbs for the garden
- Buy the herb seeds and seedlings
- Choose the best time to plant herbs
- Choose the best pots for growing herbs
- Pick the best potting soil to use for herbs
- Plant the herb seeds in pots
- Transplant the herb seedlings to pots
- Place the herb pots in the right location
- Give the required water to the herb plants
- Thin the herb seedlings in pots
- Prune the herb plants as required
- Provide the herbs with required nutrients
- Protect the herbs from any weeds
- Harvest the herbs from your garden
- Store the harvested herbs for later use
If you’re looking for quick instructions about growing your own herb garden in pots, you can download the checklist below,
What are herbs?
A herb is the leafy part of a plant that can be used to add flavor or seasoning to food.
Examples of herbs are basil, thyme, oregano, cilantro, lavender, mint, and rosemary.
They are different from a leafy vegetable like spinach because they are only used to add flavor. A vegetable like spinach is the main ingredient of the dish.
Herbs are also different from spices because herbs are the leafy parts while spices come from the other parts like the fruit, seed, flower, stem, or bark of the plant. Spices include cardamom, cinnamon, cloves, and star anise.
What are some varieties of herbs?
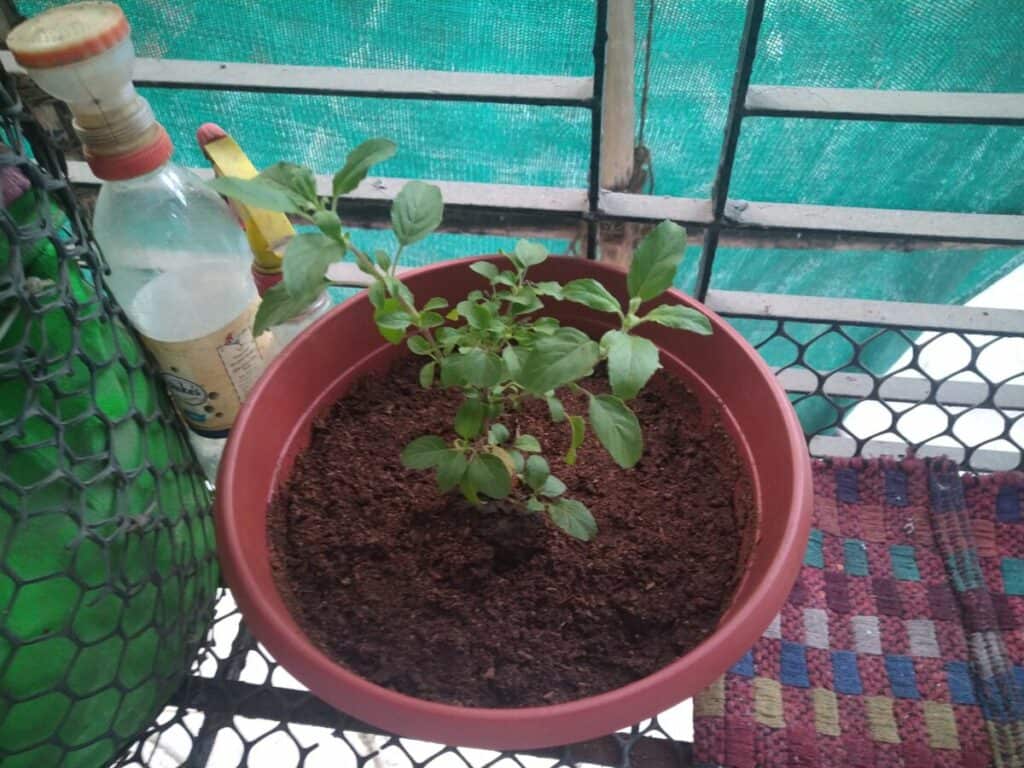
Basil
Basil is a herb that belongs to the mint family. You can get more than 60 varieties of basil with different colors and sizes. The plant can vary from 11 inches to 50 inches in height.
The basil leaves have a fragrant, sweet smell and are peppery in taste. You can use the leaves fresh or dried but they have a difference in taste. It’s a herb that’s often used in Italian, Thai, and Vietnamese cuisine.
Dill
Dill is a herb that belongs to the parsley family. The plant can grow from 16 to 24 inches depending on the variety you choose.
The dill plant has feathery leaves that have a grassy, licorice flavor to them. They have been used in many cuisines of Europe and Asia especially as a seasoning for meats, eggs, and salads.
Parsley
Parsley is a herb that has a mild flavor and fresh taste. The plant can act as a biennial and can grow up to 30 inches tall.
The fresh taste of the leaves makes it suitable for use as a garnish in foods like soups, salads, meats, and stews. It’s widely used in Mediterranean, Middle Eastern, Brazilian, and American cooking.
Mint
Mint is a popular herb among gardeners that has a sweet flavor and fragrance. It leaves a cool effect on the tongue. There are different varieties of mint like peppermint, spearmint, apple mint, etc.
The plant can grow from 4 to 50 inches tall depending on the variety. It’s a suitable herb for use in hot and cold drinks, baked goods, confectionery, as well as sauces. It’s a staple herb used in the Mediterranean. Asian, and Middle Eastern cuisine.
Rosemary
Rosemary is a herb that belongs to the mint family. It can grow 5 to 7 feet tall and is a perennial plant. The leaves are thin and needle-like while the flowers can range from white to purple.
The rosemary leaves are aromatic and have an astringent, bitter taste. They are used as a seasoning for meat dishes and make a good addition to Mediterranean cuisine.
Oregano
Oregano is another herb that belongs to the mint family. The plant has small, green leaves and can grow from 8 to 32 inches in height. The leaves can be white, pink, or purple and attract pollinators like bees.
Oregano can have a range of flavors from spicy to mild depending on the variety. It works well as a fresh or dry herb and is often used in Italian, Mexican, and Spanish cuisine. It can be used to add good flavor to pizza, pasta, and soup dishes.
Thyme
Thyme is a herb that belongs to the mint family and has a herbal, grassy flavor. The plant can grow 6 to 10 inches tall and has small leaves on a woody stem.
The herb can be used fresh or dried as long as you can rehydrate it. It’s a staple in the Mediterranean, African, British, American, and Caribbean cuisine.
You can use the entire plant or just the leaves in your cooking. The stem is woody and you need to take it out once the cooking is done. You can use thyme to flavor savory foods like soups, sauces, meats, vegetables, and baked food.
Sage
Sage is a herb that belongs to the mint family. The plant has a woody stem, gray-green leaves, and white or purple flowers. It can grow up to 2 feet tall and is a perennial plant.
Sage is used quite often in Mediterranean, Middle Eastern, and Italian cuisine. It can be used fresh or dried in the food. Sage has an earthy flavor with a strong herbal aroma. It makes a great addition as flavoring to meat and seafood dishes.
Chives
Chives are a herbaceous plant that grows a bulb. They belong to the same family as onions, garlic, scallions, shallots, and leek. They are used quite often in Europe, Asia, and North America.
The chives have a milder flavor as compared to onions and a softer texture than scallions. It makes a great garnish for soups, salads, sauces, omelets, and spreads.
Cilantro
Cilantro is a herb that can be used for its leaves, stem, and seeds. The leaves have a mild citrus flavor while the seeds can be used as a spice called coriander.
The plant can grow up to 20 inches tall and is an annual herb. It is often used in European and Asian cuisine to prepare chutneys, sauces, and as a garnish.
The best way to use cilantro is when it’s fresh and raw because cooking tends to reduce it’s flavor.
1. Pick the right variety of herbs for the garden
The herbs you can pick to grow in your pots depends on your choice. I would recommend going with 3-4 herb plants as a beginner.
If you try to grow a lot of herb plants, you might get overwhelmed with the work. And it might be demotivating if some of the herb plants don’t grow as you expected.
So start small with a select few herbs that you know will grow well. And later, you can add more to your herb garden.
My personal choice of growing a herb garden in pots includes herbs cilantro, basil, oregano, and mint. These are often used in Indian cuisine and that’s the reason I picked them.
So go ahead and pick 3-4 herb varieties of your choice that you want to grow in your herb garden.
2. Buy the herb seeds and seedlings
The best place to buy herb seeds and seedlings is your local garden center or nursery. If you don’t have them nearby, you can also buy them through an online store.
I’ve listed some of the common herbs and the information you may find useful to grow them as part of your herb garden.
| Seed variety | Temperature | Height | Days to maturity |
| Basil | 72-82 °F | 11-50 inches | 50-75 |
| Dill | 60-70 °F | 16-24 inches | 70-90 |
| Parsley | 60-70 °F | 20-30 inches | 70-90 |
| Mint | 55-70 °F | 4-50 inches | 70-90 |
| Rosemary | 68-86 °F | 5-7 feet | 90-120 |
| Oregano | 65-70 °F | 8-32 inches | 50-75 |
| Thyme | 65-70 °F | 6-10 inches | 180-200 |
| Sage | 65-70 °F | 20-24 inches | 90-200 |
| Chives | 40-85 °F | 10-12 inches | 80-90 |
| Cilantro | 60-75 °F | 12-20 inches | 50-55 |
3. Choose the best time to plant herbs
Most herbs tend to prefer cool weather to grow well. This means you need to grow them when the temperatures are between 50 to 80 °F.
If the temperature goes below 50 °F, the seeds will not germinate or the seedling will die. If the temperature goes above 80 °F, the seedlings may wilt or they may bolt. Which means they start producing flowers and seeds making them inedible.
So if you want to enjoy fresh herbs, the best time to plant is either spring or fall. This can be just after the last frost date or a few weeks before the first frost date.
Some of the herbs like cilantro can germinate and grow fast while others may take some time. The good thing about growing herbs is you can begin harvesting them as soon as the plant has grown 2-4 inches tall. You can harvest the fresh leaves and use them in your food.
You can continue harvesting the leaves from the herbs until they mature. Then you either need to harvest the entire plant or let them go to seed for the next growing season.
4. Choose the best pots for growing herbs
The type of pot you choose depends on how large the herbs you plant are going to grow. The pot has to be deep enough for the roots and wide enough for the plant.
Many herbs will do well if you plant them in a container that is 10-12 inches deep. This gives the roots a good space to grow and gather nutrients and moisture.
The container width will depend on how many herbs you want to grow in one pot. If you want many plants, you’ll need a pot that is at least 18-24 inches wide.
The wide pot helps your herb plants grow comfortably without competing for resources like nutrients, sunlight, and moisture.
You can get pots made from plastic, terracotta, ceramic, metal, and even concrete. You can even use a grow bag for growing herbs.
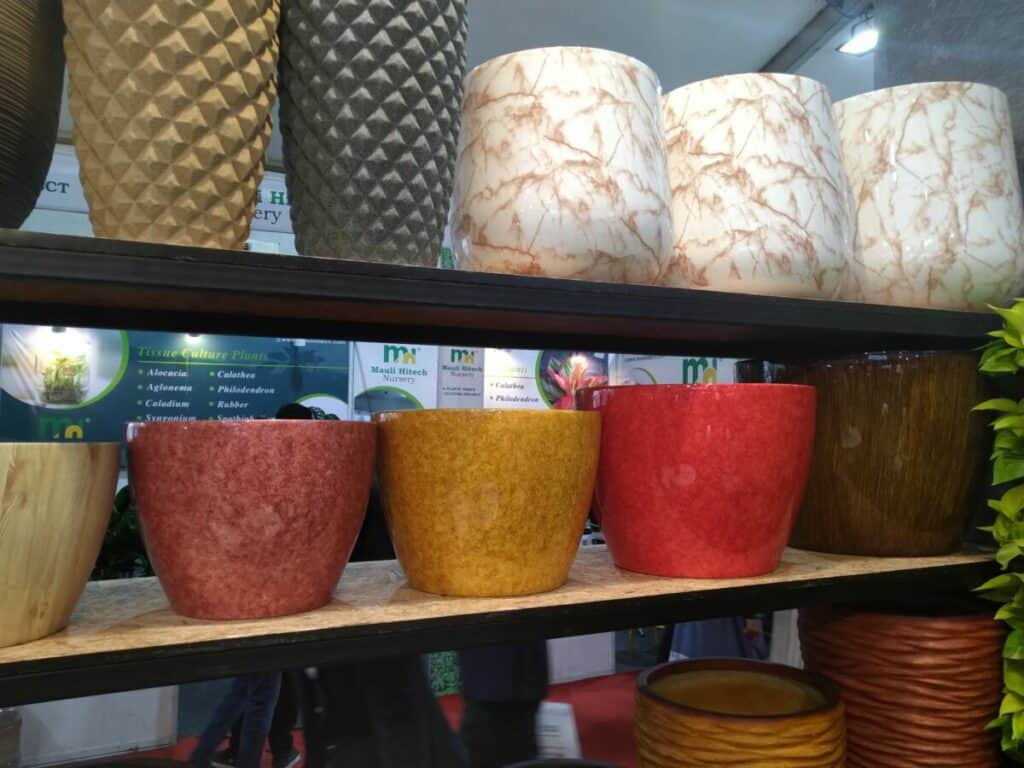
The material you choose depends on your personal choice. If you like something decorating you can choose plastic, metal, or ceramic pot. If you want something that looks earthy, terracotta is a good choice. And if you want a pot that is really strong against the wind and elements, a concrete one works well.
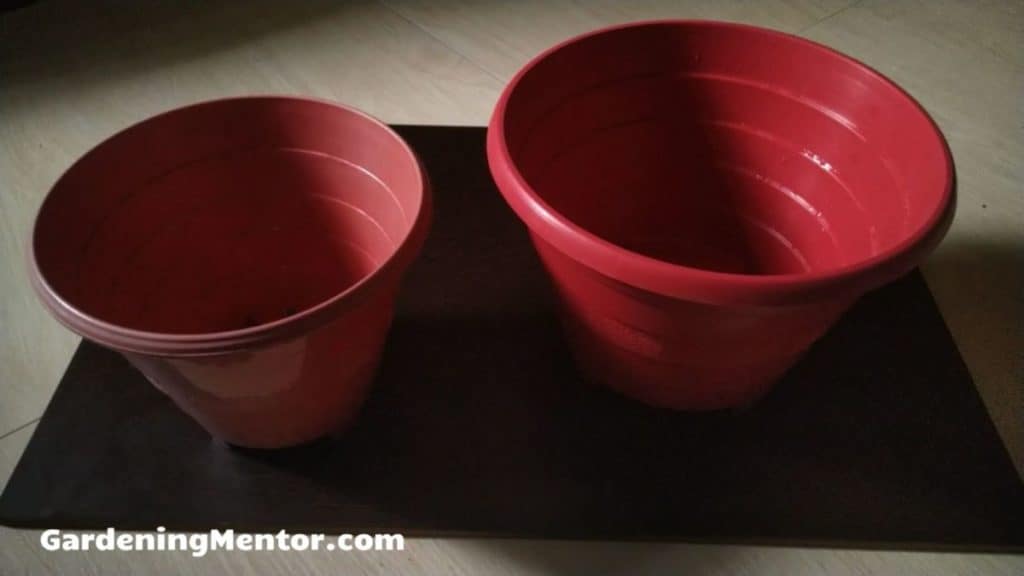
I prefer a plastic pot because it is inexpensive, lightweight, and durable. And if I need to move the plants around it’s a lot easier with a plastic pot than a ceramic or metal one.
Terracotta pots are good as well but they are made from a porous material. So the water seeps out through the pores and you’ll need to water the plants more often.
Whether you buy a new pot or reuse an old one, make sure to wash it before use. I would recommend soaking the pot in a mixture of 1 part bleach to 9 parts water for at least an hour. This kills the harmful pests and diseases that may be lurking around in the pot. Then wash the pot well with water and dry it before you plant the herbs.
Another important factor when choosing a pot is to check for drainage holes at the bottom. This will help the excess water drain out so your herb roots don’t drown. It’s OK to buy a pot without drainage holes but you will need to drill some into the pot yourself.
I’ve researched some plastic pots you can use for growing herb plants. These will hold just 1-2 herb plants so if you want a large one just select that option. I would suggest you grow each herb in a separate pot as that would make growing them simple.
| Name | Width | Height |
| Novelty Round Pot | 10.25 inches | 9.8 inches |
| Bloem Saturn Planter | 9.75 inches | 8.5 inches |
| Fiskars Planter | 13 inches | 10.25 inches |
| Bloem Freesia Planter | 12.5 inches | 11 inches |
| La Jolíe Muse Pot | 14.2 inches | 10.6 inches |
5. Pick the best potting soil to use for herbs
When growing any plant in a pot, it’s best not to use garden soil. It can be full of clay or sand that makes it unsuitable to retain moisture and drain out excess. The garden soil may contain pests, diseases, and harmful chemicals you don’t want in your food.
A good potting mix is crucial to get the best growing herb plants. So don’t worry about spending a little bit of money on such a potting mix as it’s worth the price. A neutral potting mix works fine as long as it’s loose and drains water well.
Add the potting mix to the pot so that it’s almost full. You want to leave 1-2 inches from the rim of the pot. When you water the herbs, the water and soil should not spill out of the pot.
You can use the potting mix that does not contain any nutrients to start seeds because the seeds contain enough energy until they germinate. But after that, they may need a little help with fertilizer.
The best thing to do would be to add compost to your potting mix when preparing the pot. This contains rich, organic nutrients and microorganisms beneficial for herbs.
If you don’t have compost, you can add a slow-release organic fertilizer to the potting mix when preparing the pot. This fertilizer will release into the soil slowly after each watering you give. The fertilizer can be a balanced one with N-P-K values of 5-5-5 or 10-10-10.
Here’s a list of potting mixes that would be suitable for growing your herb plants.
- Fox Farm Happy Frog Organic Potting Mix
- Burpee Natural Organic Premium Growing Mix
- Black Gold All Purpose Potting Soil
- Perfect Plants Organic Potting Mix
- Espoma Organic Potting Mix
6. Plant the herb seeds in pots
There are some herb seeds like cilantro that germinate and grow well directly in the pot. While there are other seeds like basil that may need help growing in a seed tray and then transplanting them to a pot.
If you’re lazy like me, I would suggest growing all herbs from seeds in the individual pots itself. It may be that some seeds don’t germinate well but we will be planting lots of them. So that gives a good chance that some of them will germinate.
Water the soil to make it moist before planting the seeds. You want it to be a little moist but not damp or soaking wet.
If the seeds you bought have a husk on them like cilantro, you can crush the seeds so the husk is broken. This will help improve the germination rates of the seeds.
Place the seeds in the soil at a slight distance from each other. You can place 2-3 seeds together because we can thin them later.
Depending on which herb you are planting, you may need to either cover them with 1/4th inch of potting mix. Or just press them lightly into the soil.
Some herb seeds need sunlight to germinate so you need to keep them on the soil surface. While other seeds can germinate only covered a little bit with the soil.
Use a spraying-can to gently spray water on the soil to keep it moist. You need to do this every day because the seeds need to remain in moist soil for germination. Many herb seeds will germinate after 2-4 weeks depending on the type and variety.
7. Transplant the herb seedlings to pots
The other way to start growing herbs in a pot is to buy some seedlings from the garden center or nursery.
The benefit is that you don’t need to spend time germinating the seeds as you get an already sprouted plant. The drawback is that you are limited in the varieties you can grow depending on what you can buy.
And you need to be careful when picking the seedling and check they don’t have any diseases or pests on them.
Once you’ve bought the seedlings, you can transplant them to the pot. Add the potting soil to the pot till it’s full. But keep 1-2 inches from the rim of the pot so the water and soil do not spill out when watering.
Take the seedling out of the container it came with. You can gently roll the plastic container so the root ball comes out. If it’s stuck in the container, you may need to cut it open and get the seedling out.
Now take out the potting soil from the center of the pot. The hole should be of the same size as the root ball of the seedling.
Place the root ball into the hole and cover it with the potting mix so the roots are completely submerged in the potting mix. Gently press the potting mix near the base of the plant so it is stable.
Water the potting mix so that it has good moisture for the roots to adjust to the transplant.
For the first few days, you need to harden the seedlings. So just keep them outdoors for a small period of time and then bring them back indoors. You can start with an hour and then gradually increase the time every day.
The hardening process helps the seedlings adapt to the outdoor environment including the sunlight and wind. Otherwise, the transplant may cause a shock to them and they won’t grow well or even die.
After a few days, you can move the pot outdoors when the seedlings have adjusted to the outdoor conditions.
8. Place the herb pots in the right location
The herb plants may need full sun or partial shade depending on the type. You may also need to move some of them out of the sunlight in the afternoon.
Too much heat will wilt the herb plants, or cause them to bolt, or worse damage them. The herb plants that need full sun need at least 6-8 hours of sunlight to grow well.
You can place the pots in a location of your container garden that receives indirect sunlight. If the heat gets too intense like in the afternoon, you need to move the pots to a shaded location.
9. Give the required water to the herb plants
Herb plants need the soil to be moist so they can absorb the moisture and nutrients from it. Some herbs can tolerate dry conditions and grow just fine while others will not grow well.
So it’s best to water the herb plants on a regular basis to ensure the soil is moist and suitable for them.
If you’re starting seeds, the best way to keep the soil moist is with a gentle spray of water from a spraying-can. This helps keep the moisture in the soil without displacing the seeds.
Once the seeds have germinated into seedlings, you can start watering them with a watering can. Herbs like to remain in moist soil to grow well. But too much water in the soil will drown the roots.
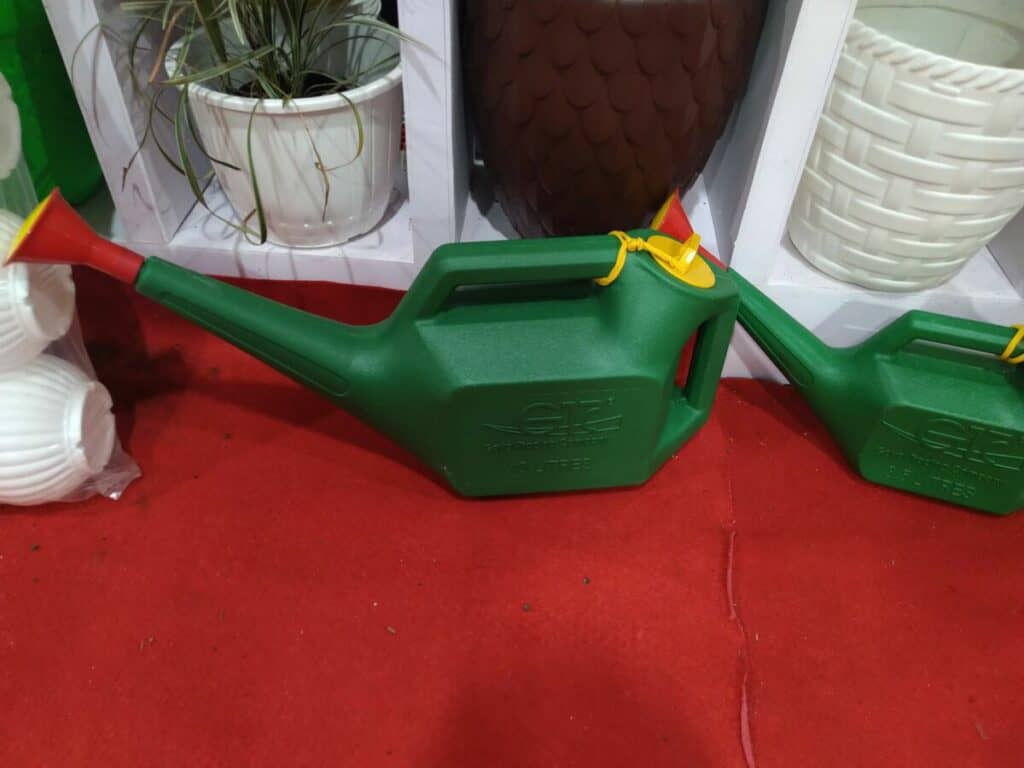
To check the moisture level in the soil, stick 1-2 inches of your finger into it. If the tip of your finger does not feel moisture, it’s time to water the soil.
Water the soil well till it drains out from the bottom of the pot through the drainage holes. This means that the water is reaching deep into the soil to the roots.
The best water to use for watering herbs is rainwater if you can collect it. The next best option is distilled water if you have a distiller at home.
I use tap water for the plants, but it’s best to leave the tap water in a container for 1 day before use. This helps dissipate the harmful chemicals like chlorine and fluoride that are present in tap water.
I like to water the plants early in the morning so the roots can absorb the required moisture before it evaporates. But avoid splashing water on the leaves as it creates a moist environment that can attract fungal diseases.
Here’s a list of watering cans you will find useful for watering your herb plants.
- Bloem Aqua Rite Watering Can
- Novelty Watering Can
- Cado Watering Can
- Gardener’s Select Watering Can
- Calunce Watering Can
10. Thin the herb seedlings in pots
When we start herbs from seed, we plant several seeds together. This helps improve the chances that at least one seed will germinate. But if there are more than one seeds that germinate, we need to thin them.
Thinning is the process where you cut off some of the seedlings that may have germinated leaving just one. You also need to cut out the seedlings that may be too close to another one leaving a few inches of space between the seedlings.
Thinning helps avoid crowding of plants where they compete with each other for nutrients. It also helps separate the plants from each other which gives good air circulation, and sunlight and protects them from fungal diseases.
I think the best time you can start thinning the seedlings is when they have grown 2-4 inches in height. You should be able to see a few leaves growing on the seedling before you prune.
From the several seedlings growing close to each other, look for the weakest, and remove it. Hold the base of the seedling and cut it out with a pair of garden pruners.
You can use the seedlings you cut out in your salad or you could add them to your compost pile if you have one.
11. Prune the herb plants as required
Pruning helps keeps your plants free from pests and diseases. It helps the herb plant focus it’s energy on growing new foliage. And it increases the number of leaves you can harvest.
Pruning means you cut off the mature parts of the plant like leaves and stems. You can do this either to cut off infected parts of the plant or leaves that have turned brown. Or you prune the herb plants to harvest the leaves for your consumption.
The best way to prune is to place your thumb and forefinger on the stem and pinch it off. You don’t want to pull on the plant but just gently pick off the stalk you need.
I like to use a pair of gardening scissors to prune the herb plants. This helps prevent creating a wound on the plant that takes a long time to heal and attract diseases.
Once you’re done with the pruning, you can add a little bit of potting mix and compost to the plants. This will give them the boost of nutrients they need to grow back again.
Here are some hand pruners you can use for pruning your herb plants.
- VIVOSUN Hand Pruners
- Fiskars Micro-tip Pruner
- GROWNEER Pruning Shears
- Felco Pruning Shears
- Corona Long Straight Snip
12. Provide the herbs with required nutrients
The best fertilizer for your herb plants is organic compost. If you have some, you can add it to the potting mix when preparing the container.
Compost is the best thing to add to the potting mix because it contains rich, organic nutrients. And it also has beneficial microorganisms that improve the soil texture.
You can add the compost every month as the herb plants are growing. If you don’t have compost, a slow-release organic fertilizer also can be added to the potting mix. This fertilizer will be slowly released into the soil as you water the plants.
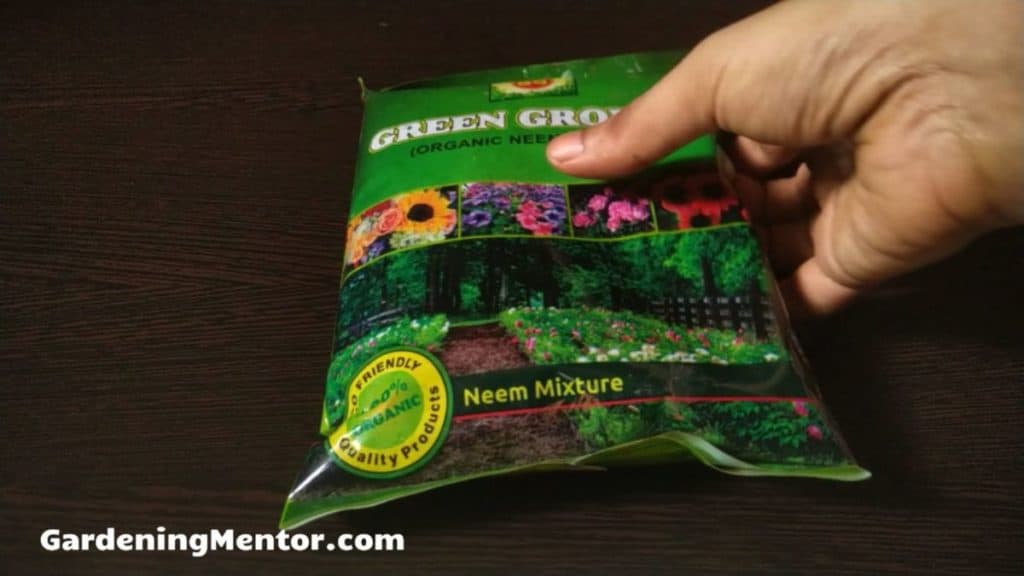
Make sure to follow the instructions provided by the manufacturer on how much and how often to use the fertilizer.
You can add the slow-release fertilizer once to the herb plant during the growing season. Or you can use an organic liquid fertilizer every 2 weeks.
Spray the liquid fertilizer on the soil as well as the foliage to give the plants a boost of the nutrients they need.
It’s good to use a fertilizer that is rich in nitrogen as it helps boost the foliage growth of the plant. Fish emulsion is a good fertilizer that is rich in nitrogen.
Be careful not to overuse the fertilizer on your herb plants as it will damage the leaves and roots.
Here is a list of slow-release organic fertilizer you can use.
Here is a list of organic liquid fertilizer you can use.
- Neptune’s Harvest Organic Fish & Seaweed Fertilizer
- Espoma Organic Grow Fertilizer
- FoxFarm Grow Big Liquid Fertilizer
13. Protect the herbs from any weeds
The benefit of growing herbs in a pot is they are much more protected from weeds than growing them in the ground.
There will still be some weeds popping up due to the seeds carried by the wind or birds.
The best solution to the problem of weeds is to add a layer of mulch to the pot. This could be organic material like grass clippings from the lawn, dried leaves from the yard, or moss you collect near the house.
Add the mulch only when the herb seedlings have grown about 2-4 inches tall. The mulch helps prevent weed seeds from germinating as it blocks the sunlight from reaching them.
Another benefit of adding mulch to the container is it keeps the moisture in the soil to last longer. It slows down the evaporation of the moisture from the heat of the sun. And it regulates the temperature in the soil. So it remains cool and suitable for your cilantro plants.
The organic mulch also breaks down over time and adds beneficial nutrients to the potting soil. Mulch materials like grass clippings and dried leaves are also a good source of nitrogen for the plants.
14. Harvest the herbs from your garden
Many herbs tend to grow fast and you may be able to harvest the leaves after 3-4 weeks of sowing the seeds.
The plant should have reached at least 4-6 inches in height before you start harvesting the leaves. The more leaves you harvest, the more foliage the plant will grow.
It’s important to only harvest about 1/3rd of the leaves from the herb plants at one time. This leaves enough on the plant to continue growing further and getting more harvest.
The best way to harvest is to pick the leaves that have matured. You can pinch them off with your thumb and fingers.
Or you can use a pair of gardening scissors to cut them off the plant. It’s important to not pull on the plant as you’re harvesting the leaves.
I would suggest adding some compost and potting mix near the base of the plants once you’re done with the harvesting. This will give the plants a boost to grow new foliage.
If you want to harvest the entire plant, you need to wait for its maturity. You will find this on the packet of seeds or on the label when you buy a seedling. You can cut the entire plant at the base once it’s ready for harvesting.
15. Store the harvested herbs for later use
The best time to use herbs is as soon as you harvest them from the plant. That’s why you should only harvest the leaves when you’re going to use them.
There are options to store the herbs even if you don’t need to immediately use them. Two such methods are either freezing the leaves or drying them up for later use.
Freezing the herbs
If you freeze the herbs and store them in the refrigerator you can use them for weeks or months.
Here’s how you can freeze the leaves so you can take out how much you need for your use in the kitchen.
- Clean the harvested herb stalks with water to remove any dirt from them.
- Place the individual stalks on a paper towel to dry them well.
- Separate out the leaves from the stalks. You can use the stalks in your cooking or dispose of them.
- Place some baking paper on a baking tray. Then place the leaves on the baking paper so they are separated from each other.
- Place the baking tray in the freezer for 30 minutes so the leaves are frozen. This is done so the leaves don’t stick to each other when you store them.
- Take the baking tray out of the freezer and use a plastic freezer bag to put the leaves in it. Do this immediately before the leaves with thaw and stick to each other.
- Take the air out of the plastic bag so the cilantro leaves don’t dry out.
- Store the plastic bag in the freezer and the leaves can last for 2 months.
- You can take the individual leaves out of the plastic bag for your use in the kitchen.
Drying the herbs
If you dry the herbs and store them you can use them for weeks or months.
Here’s how you can dry the leaves so you can take out how much you need for your use in the kitchen.
- If there are leaves that are yellow or diseased, you can throw them away. Clean the remaining stalks that you harvested with water to remove dirt from them.
- You need to keep the herb stalks overnight spread out on a bench so they can dry out with good air circulation.
- You can then tied the stalks in a bunch with a string and hang them in a dark, dry place.
- After about two weeks, the bunch of herbs will be fully dried out.
- You can cut off the leaves from the stalk and put them in a clean glass jar. Keep this glass jar in a dark, dry place.
- You can use the dried leaves in your food as you need them. You could even crush the leaves in a fine powder for topping your dishes.
- The dried leaves will last you several months as long as you keep them in a dry, dark place.

Fact Checked, Written, and Published by Kevin Rodrigues
Kevin is the founder of Gardening Mentor, a website that aims to teach people to grow their own food in a limited space. As a self-taught gardener, Kevin has spent several years growing plants and creating gardening content on the website. He is certified in Home Horticulture and Organic Gardening from Oregon State University. He has a Post Graduate Diploma in Horticulture and Landscape Gardening from Mumbai University.
Read more

