Mint plays an important role in our cuisine, especially when making chutneys. That’s why I’m trying to grow some at home. This is my research that will help you to grow mint in a pot as well.
You can grow mint in a pot by using seeds. You can choose a pot that is 8 to 10 inches to grow mint. Sow the mint seeds in quality potting soil and they will germinate in a few days. Add nitrogen rich fertilizer to give a boost for growing mint foliage. Mint will be ready to harvest in a few weeks.
If you’re short on time and looking for a quick step-by-step guide for growing mint in a pot, download the checklist below. If you need more information, keep reading the detailed guide below.
What is mint?
Mint is a perennial herb that has a distinct scent and flavor. It’s been grown and used for a long time in Asia, Africa, and even Europe.
Mint has been used not just as part of food, drinks, and sweets but also as a medicinal herb. It’s been used to treat indigestion, sore throat, and respiratory illnesses.
You can consume mint leaves when they are harvested fresh from the plant or after drying and preserving them.
What are some varieties of mint?
Peppermint
If you’re looking for a mint plant with a strong flavor, the peppermint is suitable for you. It has a strong menthol flavor you can use in beverages, tea, and desserts.
The plant needs partial sunlight and grows 12-36 inches in height when it’s fully mature.
Spearmint
This is a mint variety that can grow in full sun and does not mind a little bit of heat. It has a mild, sweet flavor that makes it good in savory dishes and tea.
Pineapple mint
This variety of mint is non-invasive unlike some of the others. It means you can grow them in pots as well as in the ground. It will not compete with the other plants for resources.
The pineapple mint has a light, citrus flavor that makes it suitable for adding to your tea.
Lemon mint
This is another mint variety that comes with a light citrus flavor. It makes a great addition to iced tea or lemonade.
Apple mint
Apple mint is a variety that has a light apple flavor making it a good choice for your drinks and salads.
Orange mint
Another mint variety that has the citrus flavor of orange. You can use this orange mint in beverages, salads, fruits, tea, or ice cream.
Peppermint chocolate
As the name suggests, peppermint chocolate has a flavor of mint and chocolate together. It’s a good addition to cold drinks and tea.
Cotton candy mint
Cotton candy mint has a very sweet flavor that makes it suitable for desserts, sweets, and tea.
Where can you buy mint seeds?
You can buy mint seeds from your local garden center or nursery. There are also a lot of online stores that sell several varieties of mint seeds.
I’ve listed some of the mint seed varieties you can buy along with the temperatures they need and the height they will grow.
| Seed variety | Temperature | Height | Days to maturity |
| Peppermint | 68-75 °F | 12-36 inches | 75 |
| Spearmint | 68-75 °F | 12-36 inches | 75 |
| Pineapple mint | 68-75 °F | 12-24 inches | 90-120 |
| Lemon mint | 68-75 °F | 30-38 inches | 110-120 |
| Apple mint | 68-75 °F | 18-24 inches | 60 |
| Orange mint | 68-75 °F | 18-24 inches | 90-200 |
| Peppermint chocolate | 68-75 °F | 18-24 inches | 90-120 |
When is the best time to plant mint?
Mint is a cool-season plant that needs the temperature to be in the range of 50-85 °F to grow well.
If the temperature rises beyond a certain level, the mint will start reaching its end of life. This means it will start to bolt, growing flowers and seeds. The mint will not be edible at this point.
The best time to plant mint is just after the last frost date has passed and spring arrives. Or at the end of summer when the weather is starting to cool down as fall arrives.
Mint is a herb that grows pretty fast so you’ll be able to harvest the leaves and plants many times for the growing season.
How to choose a pot to grow mint?
Mint loves to grow whether it’s in a pot or in the ground. It’s an invasive plant that will bully the other plants in the garden. That’s why you need a big enough container to keep mint happy.
The pot that you select to grow mint should be at least 8-12 inches deep. This gives the roots a good space to grow to search for nutrients and moisture.
If you want to grow plenty of mint, choose a pot that is wide. A pot that is 18-24 inches wide will give good growing space for your mint plants.
The large width of the pot helps you grow several mint plants together without them crowding each other and competing for resources.
It does not matter what type of container you choose. Pick one based on your preference. This could be a plastic, terracotta, ceramic, or metal pot. I like to use a lightweight pot because I grow them in the balcony that can’t hold a lot of weight.
The plastic pots are durable, lightweight, and inexpensive. Sometimes, I also use a grow bag as that is lightweight and easy to move around. I can also adjust the height of the grow bag by folding it based on the depth the plant needs.
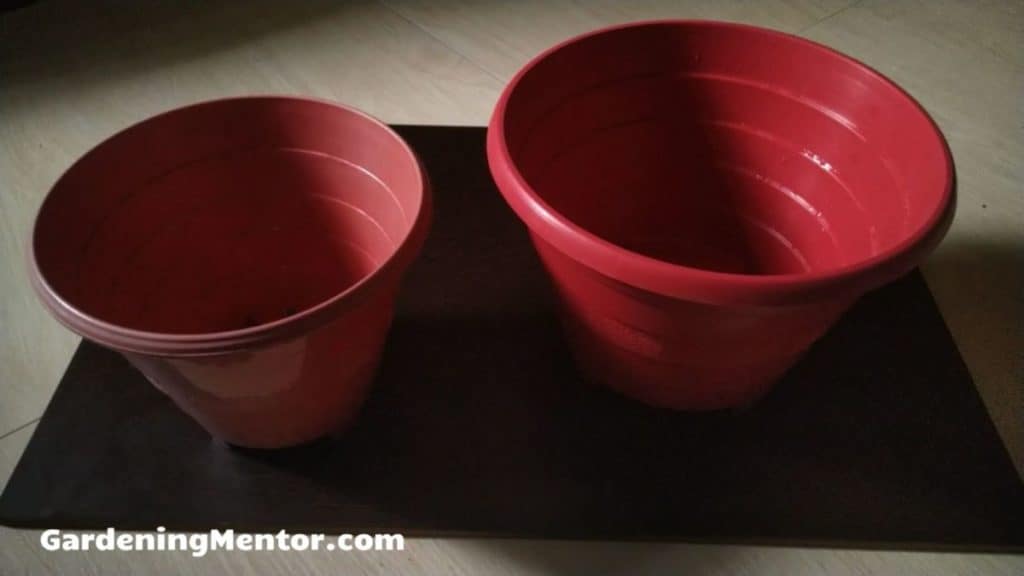
Terracotta pots are good as well but they are made from a porous material. So the water seeps out through the pores and you’ll need to water the plants more often.
The pot you choose should have drainage holes at the bottom. This will help excess water to drain out from the holes. The mint plants like to remain moist but overwatering will drown the roots and kill the plants.
If you don’t find a pot with drainage holes, don’t worry. You can drill some holes yourself with the help of a drill machine.
Once you buy or reuse a pot, make sure to wash it before use. You can soak the pot in a mix of 1 part bleach to 9 parts water for one hour. Then wash the pot well with water. Keep the pot to air dry before trying to grow the mint plants.
Here’s a list of plastic pots that I think are suitable to grow a few mint plants.
| Name | Width | Height |
| Novelty Round Pot | 10.25 inches | 9.8 inches |
| Bloem Saturn Planter | 9.75 inches | 8.5 inches |
| Fiskars Planter | 13 inches | 10.25 inches |
| Bloem Freesia Planter | 12.5 inches | 11 inches |
| La Jolíe Muse Pot | 14.2 inches | 10.6 inches |
Which potting soil should you use?
The worst thing you can do to your mint plants is to grow them in garden soil. It may contain pests and diseases that will attack the plants.
The garden soil may be full of clay or sand that would not be suitable to provide the mint plants with the required aeration and moisture. Or worse, the garden soil may contain harmful chemicals that would affect your plants as well as your family.
I would recommend always picking a good potting mix that is sterile and safe to grow your herb plants in. The potting mix has a texture that helps it retain moisture while draining out the excess.
Once you’ve got a pot for your mint plant, fill it up with the potting mix. But leaving 1 inch from the rim of the pot empty. This helps keep the soil and water from spilling out when you water the plants.
Seeds are a wonderful creation of nature. They contain all the nutrients the plant needs till the time they germinate. So you just need to plant the seeds in the potting mix and give them the required sunlight and water.
The seeds will germinate after 2-3 weeks and you can then think about adding a little compost or fertilizer for the mint plants.
If you have compost, you can mix it up with your potting mix while preparing the pot. The compost contains rich nutrients and beneficial microorganisms for growing mint.
If you don’t have compost, you can add a slow-release organic fertilizer to the potting mix when preparing the pot. This fertilizer will release into the soil slowly after each watering you give. The fertilizer can be a balanced one with N-P-K values of 5-5-5 or 10-10-10.
I’ve researched a list of potting mix that would work well for growing your mint plants.
- Fox Farm Happy Frog Organic Potting Mix
- Burpee Natural Organic Premium Growing Mix
- Black Gold All Purpose Potting Soil
- Perfect Plants Organic Potting Mix
- Espoma Organic Potting Mix
How to plant mint seeds in the pot
It’s best to start the mint seeds in a seed starting tray and then transplant them to a larger pot once they have grown. The mint seedlings need a little bit of care for them to germinate well.
You can add the potting mix to the tray and water it well before trying to plant the mint seeds. Place the mint seeds on the soil and gently cover them with a tiny amount of potting soil. You can plant 2-3 seeds per tray to get the best chance of germinating at least one of them.
Water the potting mix gently with a spraying-can to keep the seeds moist. Do this every day and you will have germinated mind seedlings in about 2 weeks time.
Once the seedlings have germinated and grown 2-3 inches in height, you can transplant them to a bigger pot.
Fill the bigger pot with sufficient potting soil. Then scoop out some from the center to make a place for the mint plant.
Gently tap the base of the seed starting tray to dislodge the mint seedling. Hold the root ball and base of the plant as you transplant it.
Place the seedling roots into the hole you dug in the center of the bigger pot. Make sure to cover the roots with the potting mix so they are not visible. Water the potting mix well so that it turns moist for the mint seedlings.
Where to place the pots?
Most mint varieties need at least 6-8 hours of sunlight to grow well. They don’t do well in the heat so when it gets too intense like in the afternoon, move them into the shade.
Too much heat will cause the mint plants to wilt and bolt which means they will start producing flowers and seeds.
Place the pot with the mint plants in an area of the garden, patio, or balcony that receives the required amount of sunlight.
How to water mint plants
Mint seeds need to remain moist so they have a good chance of germination. Keep the potting mix in the seed starting tray moist by spraying water on it.
Once the seedlings have germinated and you’ve transplanted them to a bigger pot, you can start watering them with a watering can.
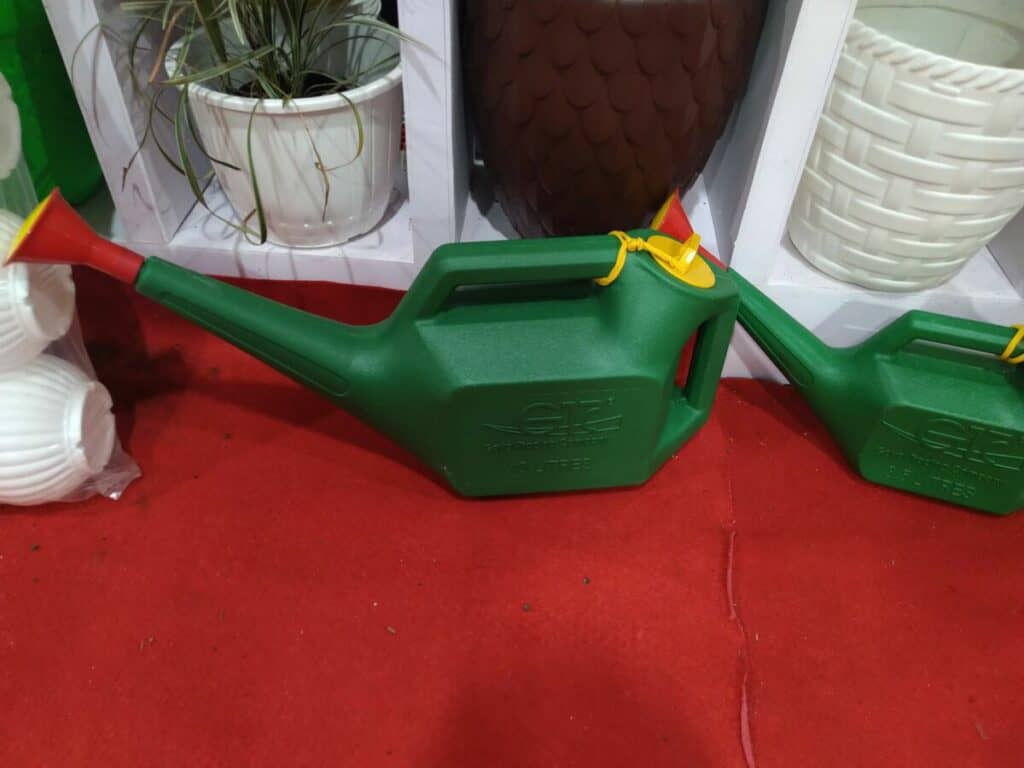
You want to keep the potting mix moist but avoid overwatering the soil. This leads to problems like root rot when the roots are drowning in water. And you’ll end up killing the mint plants.
Every day in the morning you can check the moisture level of the soil in the pot. Stick your finger 1 inch into the soil. If the tip of your finger does not feel moist, it’s time to give the soil a good watering.
Water the soil well till it drains out from the bottom of the pot through the drainage holes. This means that the water is reaching deep into the soil to the roots.
The best water to use for watering mint is rainwater if you can collect it. The next best option is distilled water if you have a distiller at home.
Most people including me will only have access to tap water. That is fine to use but you need to keep the tap water in a container for 12-24 hours. This helps dissipate chemicals like chlorine and fluoride from the water which can be harmful to the plants.
I find the best time to water your mint plants is in the morning. This helps the roots get the required moisture before the sun comes out and evaporates the water on the surface.
You want to avoid splashing water on the leaves of the mint plants when watering. The moist leaves will attract fungal diseases like powdery mildew.
Here are some watering cans you may find useful for watering your container plants.
- Bloem Aqua Rite Watering Can
- Novelty Watering Can
- Cado Watering Can
- Gardener’s Select Watering Can
- Calunce Watering Can
How to thin the mint seedlings
If you followed the steps above, you may have planted 2-3 seeds together. Now when the seedlings will have grown, you might have more than one growing close to each other.
Now you have to follow the process of thinning where you keep the strongest seedling and cut out the rest. This will give the one seedling the best resources from the soil. You can use the seedlings you took out in your salad.
Thinning helps prevent the mint plants from competing for resources. And it helps maintain distance between the plants so there is good air circulation. This helps prevent moist conditions and fungal diseases.
The best time to start thinning the seedlings is when they have grown 2-4 inches tall. You can see a couple of the leaves have grown on the seedling.
You can use a pair of gardening scissors or pruners to cut out the unwanted seedlings from the pot. Hold the seedling at the base just beneath the first leaves of the plant and cut it out.
How should you prune the mint plants?
A good reason to prune your mint plants is to remove dead or infected leaves. This helps the mint plant concentrate on growing new foliage instead of trying to heal the infected leaves.
Another reason to prune the mint leaves is that it encourages more foliage growth. The more you harvest the leaves, the more it will produce. You prune the mature leaves for your consumption while leaving most parts of the plant.
The best way to prune is to place your thumb and forefinger on the stem and pinch it off. You don’t want to pull on the plant but just gently pick off the stalk you need.
You need to be careful when pruning not to pull and damage the plant. The safest way to prune is by using a pair of gardening scissors or pruners. This helps you harvest the leaves without hurting the plant. And the wound on the plant heals a lot faster.
I suggest adding some potting mix and compost to the plants whenever you are done with the pruning. This gives them the nutrient boost they need to produce more foliage.
Here are some hand pruners you can use for pruning your mint plants.
- VIVOSUN Hand Pruners
- Fiskars Micro-tip Pruner
- GROWNEER Pruning Shears
- Felco Pruning Shears
- Corona Long Straight Snip
Does mint need fertilizer?
The mint seeds don’t need fertilizer as seeds contain the energy so they can germinate. However, once the seedlings have germinated and grown to 1-2 inches, it’s good to add some fertilizer.
My advice is to mix in compost with the potting mix when preparing the pot. This provides rich, organic nutrients to the seedlings. The compost also adds beneficial microorganisms to the soil.
Keep adding a little bit of compost every month to keep the soil rich in nutrients and microorganisms.
If you don’t have compost, the next best thing is to mix in a slow-release organic fertilizer into the potting mix when preparing the container. This will release into the soil when you’re watering the plant and provide the essential nutrients.
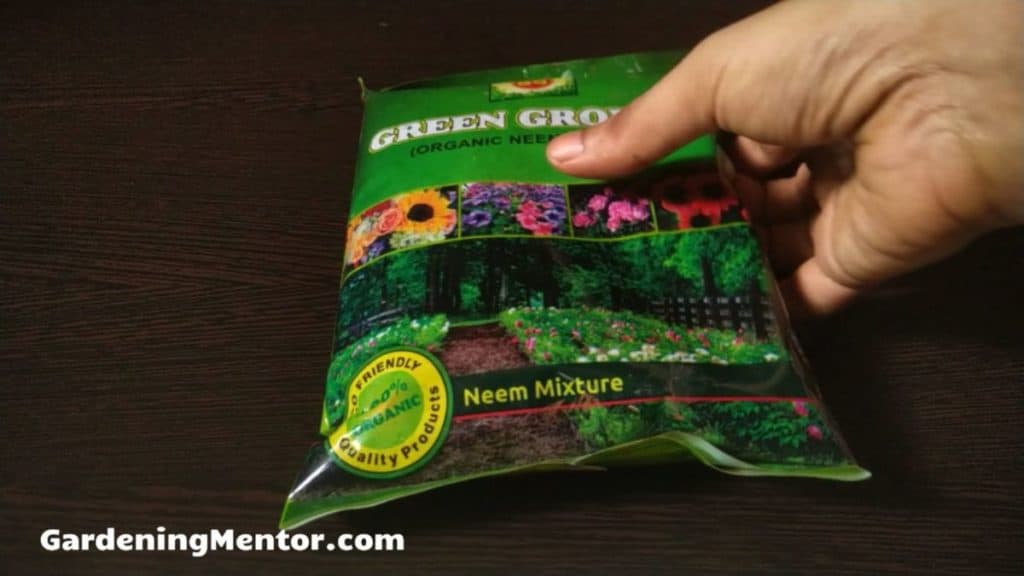
Too much fertilizer can be harmful to the mint plants so follow the instructions provided by the manufacturer on the amount and the number of times to apply.
After the plants have grown 2-4 inches, you can apply the slow-release fertilizer once during the growing season. Or you can use an organic liquid fertilizer every 2 weeks.
Spray the liquid fertilizer on the soil as well as the foliage to give the plants a boost of the nutrients they need.
For plants like mint where you need the leaves, it’s good to use a fertilizer that is high in nitrogen. A fish emulsion fertilizer is a good choice that has a high amount of nitrogen.
Here is a list of slow-release organic fertilizer you can use.
Here is a list of organic liquid fertilizer you can use.
- Neptune’s Harvest Organic Fish & Seaweed Fertilizer
- Espoma Organic Grow Fertilizer
- FoxFarm Grow Big Liquid Fertilizer
How to protect mint from weeds
The benefit of growing mint in a pot is you limit the problems it can have from weeds invading the soil.
There will still be some weeds growing in the pot due to the wind or birds dropping some seeds. But you can take care of such weeds the moment they are visible in the pot.
The best solution to avoid the problem of weeds is to add a layer of mulch to the pot. You can use organic material like grass clippings, dried leaves, straw, or moss that works as a mulch.
Allow the mint seedlings to grow at least 2-4 inches before adding mulch to the soil. The mulch layer blocks sunlight and does not allow the weed seeds to germinate.
The mulch also keeps the soil temperature regulated so it will neither get too warm nor too cold. This regulated temperature gives the mint plants the best conditions to grow their roots in the soil.
As the organic mulch breaks down slowly, it will add beneficial nutrients to the soil. Grass clippings and dried leaves are a good source of nitrogen for the plants.
You should also understand that the mint plant itself can act as a weed due to its aggressive growth. That’s why it’s best to grow mint in a separate pot and not grow other plants along with it. Otherwise, it will grow over those plants and compete for their nutrients in the soil.
How to harvest mint
Mint is a plant that grows fast. So fast, that it can invade your garden if you’re not careful monitoring it. That’s why growing them in a pot is the best idea as they are prevented from doing this.
You can begin harvesting the leavest 3-4 weeks after sowing the seeds. I would suggest you harvest the leaves only after the plant has grown 4-6 inches. This is the stage where the plant is mature enough so the more you harvest, the more foliage it will grow.
The important thing is to not harvest more than 1/3rd of the leaves on the plant at one time. This keeps the remaining leaves so the plant can continue growing further.
The best time to harvest the mint is in the morning before the sunlight reaches the plant. This helps you get the fresh mint with the most flavor. They are even more flavorful when you harvest them after the first frost.
The best way to harvest is to pick the leaves at the top. You can pinch them off with your thumb and forefingers.
I would prefer using a pair of gardening scissors that make it easier to cut the leaves without harming the plant.
Once you’ve harvested the leaves, you can add a little bit of compost and potting mix near the base of the plant. This helps the plants get the nutrients they need to grow further.
You can harvest the entire mint plant once it has matured as mentioned on the seed packet. This could be anywhere from 60-200 days depending on the mint variety you are growing. The best way to harvest the full mint plant is to cut it at the base.
How to store mint
You can get the most flavor out of the mint leaves as soon as you have harvested them from the plant. So you should harvest them only when you need the leaves.
But there is a good way to store the harvested mint leaves for several months by using the below method of drying them.
- If there are any leaves that are yellow or brown or infected, you can cut them off. Clean the harvested mint stalks with water to remove any dirt from them.
- Let the mint stalks dry overnight on a bench keeping space between them so there’s good air circulation.
- Make bunches of the mint stalks and tie them together with a string.
- You can then hang the tied mint stalks in a dark, dry place in the house.
- After about two weeks, the bunch of mint will be fully dried out.
- You can then cut off the leaves and put them in a glass jar. Keep the glass jar in a dark, dry place.
- You can use the dried mint leaves in your tea, beverage, dessert, or recipe as you need them.
- The dried mint leaves will last you several months as long as you keep them in a dry, dark place.
Pests and diseases that affect mint
Mint has a strong smell and that helps to protect it from some pests and diseases. But there are some others that can still affect it.
The benefit of growing mint in a pot is you keep it isolated from the other plants and the environment. This also helps to lower the risk of pests and diseases on the plant.
The best way to keep fungal diseases from infecting the mint plant is to avoid splashing the soil or water on the leaves. And it also helps to grow the mint in a location that has good air circulation.
It’s your responsibility to inspect the mint plant and leaves every morning when you go to water the pot. This helps you immediately find out issues caused by pests and diseases. And you can take the right action before it becomes a full-blown problem that kills the mint plant.
Pests
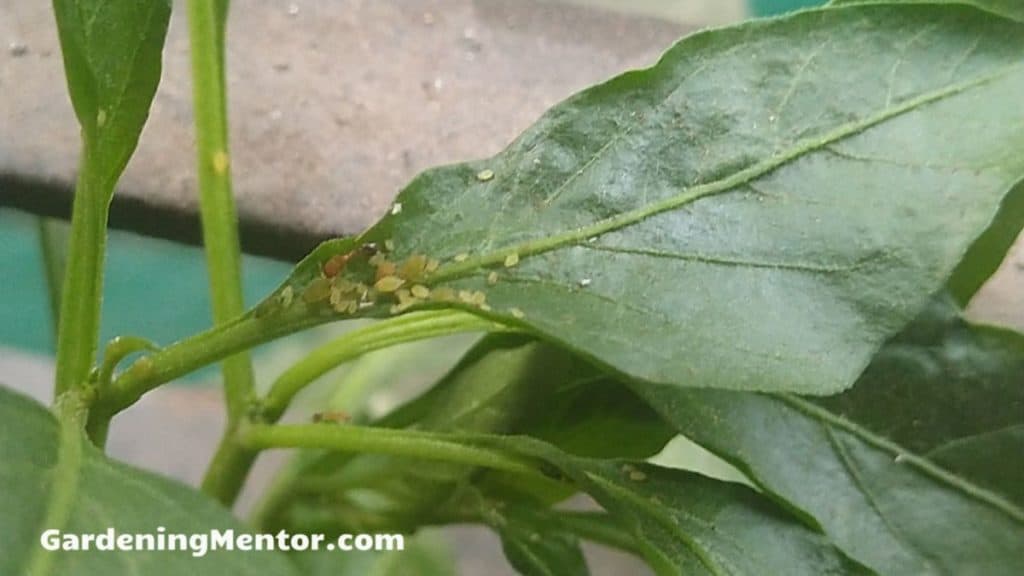
Aphids: These are small sap-sucking insects that come in different colors like green, white, yellow, red, orange. It’s easy to get rid of aphids by spraying them with water and dropping them to the ground. Or using insecticidal soap on the affected parts of the mint plant.
Cutworms: The larvae of adult months are known as cutworms. They damage the plant by eating the base of the stem or the roots causing the plants to die. They may come in colors like grey, pink, green, or black and maybe solid, spotted, or striped. To protect your mint plants from cutworms, you can cover the stem with a toilet paper tube.
Root-knot nematode: If your mint plant gets infected by these microscopic worms, there’s not much you can do other than dispose of the affected plant and potting soil. These worms feed on the plant’s roots developing rounded galls on them.
Diseases
Bacterial leaf spot: The mint plants can get affected by bacterial leaf spot that causes brown or black spots on the leaves. Slowly these spots increase in size and cause the leaves to wilt. The only way to avoid this disease is to protect your mint plant’s foliage from getting splashed with soil or water. Another option is to select a mint seed variety that is made resistant to this disease.
Powdery mildew: This is another fungal disease you can prevent by keeping the foliage of the mint plants free from water. It causes white-gray powdery growth on the leaves of the mint plant. You can also cut off the leaves that have been infected with this disease.
Soft rot: The reason your mint plants may get infected with this bacterial disease is a moist environment. So keep the plants clean and free from the water on the foliage. Ensure there is sufficient distance between plants as well as leaves so there is good air circulation.

Fact Checked, Written, and Published by Kevin Rodrigues
Kevin is the founder of Gardening Mentor, a website that aims to teach people to grow their own food in a limited space. As a self-taught gardener, Kevin has spent several years growing plants and creating gardening content on the website. He is certified in Home Horticulture and Organic Gardening from Oregon State University. He has a Post Graduate Diploma in Horticulture and Landscape Gardening from Mumbai University.
Read more

